Create an Integration
From the Developer Settings → Integrations tab, click New Integration to connect SmartSchema with an external API or service.
You’ll be guided through three configuration steps: Basic, Settings, and Behavior.
Step 1: Basic Configuration
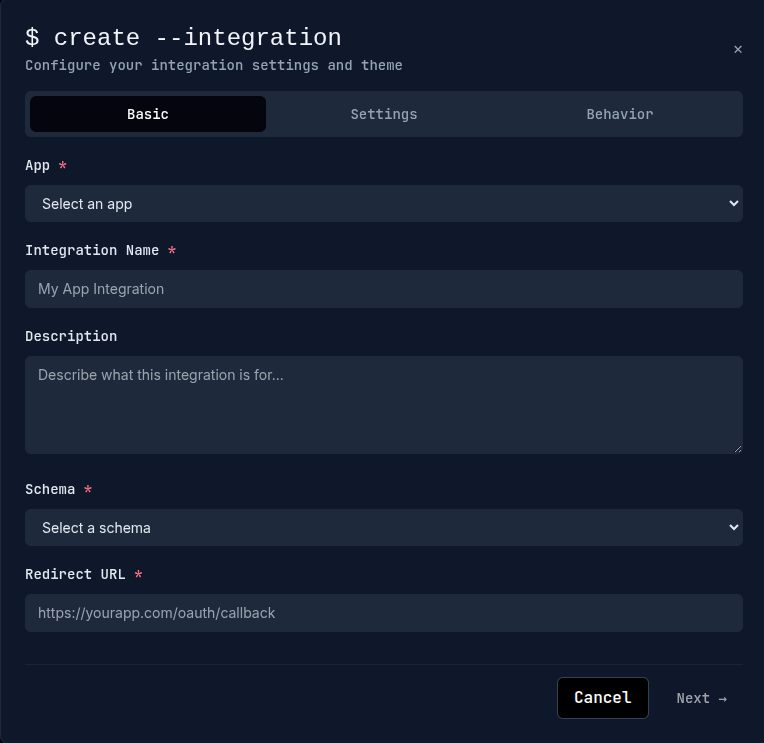
- Select an App from your existing SmartSchema applications.
- Enter a descriptive Integration Name (for example, “Salesforce Import”).
- Optionally add a Description to explain the purpose of this integration.
- Choose a Schema to define the data structure this integration supports.
- Provide a Redirect URL — the page your users return to after data submission (for example,
https://yourapp.com/oauth/callback).
Step 2: API Settings
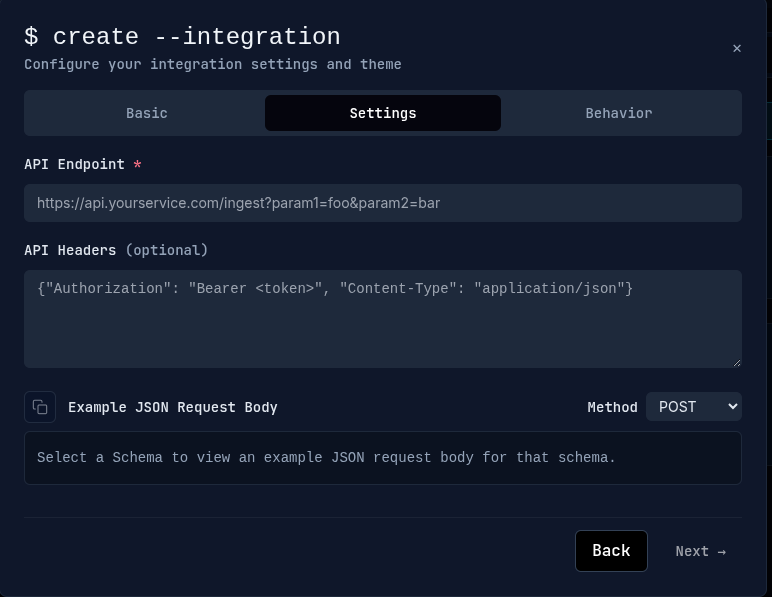
In this step, you configure how SmartSchema sends validated data to your external service.
API Endpoint — Enter the destination URL where the data should be delivered.
Example:https://api.yourservice.com/ingest?param1=foo¶m2=barAPI Headers — (optional) Add authentication and content-type headers that your endpoint requires. If your headers include dynamic values (for example per-user Authorization tokens), prefer leaving them out of the static integration and supply them at launch time using the Launch API
overrides(use theapi_headerobject to replace headers for a single launch). See the Launch Endpoint docs for details: Launch Endpoint.Example JSON Request Body — Once a schema is selected, SmartSchema automatically displays a sample JSON payload showing the structure of validated data that will be sent to your API.
HTTP Method — Choose the method your endpoint expects, such as
POSTorPUT.
If your endpoint requires per-launch values (for example a user-specific path segment or runtime query parameters), use a templated endpoint with placeholders written as {name} in the API Endpoint field.
Examples
- Path placeholder (values are URL-quoted):
https://api.yourservice.com/{user_id}/ingest- Query placeholder (values are URL-encoded):
https://api.yourservice.com/ingest?param1={foo}¶m2={bar}Rules & tips
- Use curly braces around the placeholder name (for example
{user_id}). - Placeholder names must match keys you provide in the
overridesobject exactly; unknown keys are rejected. - If headers are constant for all launches you can store them here as static headers. To replace headers for a single launch, include an
api_headerobject in theoverridesobject when calling the Launch API. - If you supply
overrides, you must provide values for all placeholders used in the template.
To learn how to include overrides in the launch request and the exact validation rules, see the Launch Endpoint documentation: Launch Endpoint.
These settings define the connection between SmartSchema’s data validator and your backend service, ensuring data is transmitted securely and in the expected format.
Step 3: Behavior Settings
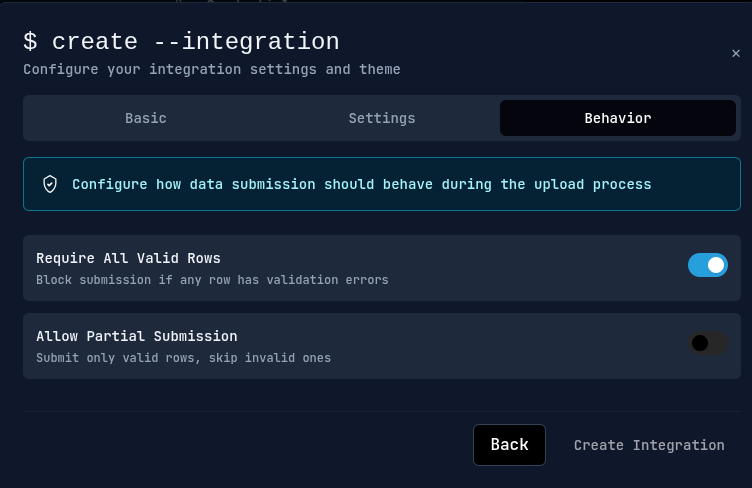
Define how data submission should behave when users upload and validate data.
- Require All Valid Rows — Blocks submission if any row fails validation.
- Allow Partial Submission — Submits only valid rows, skipping invalid ones.
This setting provides flexibility depending on whether complete data integrity or partial acceptance is preferred.
Post-Import Redirect
After users complete their import or validation process, SmartSchema automatically redirects the browser to the configured Redirect URL and appends a status query parameter to indicate the result.
Example
https://yourapp.com/oauth/callback?status_code=200You can use this status code in your backend to confirm a successful submission or handle errors gracefully.